Learn the fast and easy way to start a blog and get a free checklist too!
UPDATE April 2021: This blog is now over four years old and has been getting over 100,000 pageviews/month for years. It has had many, many, many viral posts, and these days I barely spend more than a few hours a week on the site. It generates a completely passive monthly income through ads and affiliate marketing and some people may even consider it a job-replacing income. All by following the steps in this post…nothing more! Yay for blogging!
This blog was started not too long ago (less than five months ago) and I can’t believe how much it’s grown!! I also have met other mom bloggers in this niche and actually had 2 viral posts!
See, I’m not some super duper expert blogger, although I’ve had some success over the past year or two; I’m a stay-at-home mom who decided to start blogging (freelance writing at first, actually) when my twins turned one, and I was facing going back to work. I wanted to do something to be able to stay home, and working online seemed like the best choice. I needed that connection and fun by being a SAHM.
And yeah, the monetization aspect of blogging is intriguing and let me tell you, it’s very real and life changing. But it all started with a brand new blog, many late nights, zero visitors, and absolutely NO idea what the heck I was doing.
But back to blogging, how did this blog get two viral posts in less than five months of blogging (and two of those months or more there weren’t even any posts!)?
If you’re thinking about starting a blog and want to get some quick traction, this post will help you start a blog, understand WordPress and teach you how to write viral content.
***Plus, download your Start a Blog Checklist (no email sign up required) and follow along***

Because the more pageviews and traffic you have to your new blog, the more opportunity you have for generating income, right?
And who doesn’t want a viral post (or two)? 🙂
A Little Viral Post Story
When Smart Mom Ideas first started out, things were a little slow going to say the least. Transitioning from a pure SAHM to a part-time blogger or WAHM can be quite a shock!
From learning about blogging, to WordPress, to Canva, to social media and more, who has any time left to actually write blog posts?!
Things started to get rolling in May and six posts actually got published! Wha, what?! There must have been some real mom mojo flowing that month. Before that, it was a post every month or two…on a good month.
In May the blog grew from practically 0 visitors a day to 450 visitors to 1,200 and later up to 2,500 visitors….in one day!
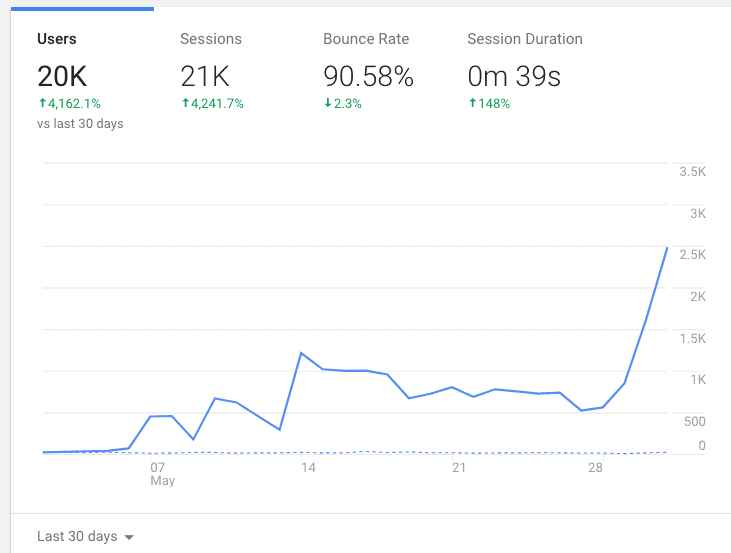
I was shocked!
Like I had mentioned, posts were very infrequent before that and the blog wasn’t growing at all. But once a few posts got out there, along came traction…and a lot of it!
The first semi-viral post was about how to live on one income so you can be a SAHM. It’s a list post of 63 ways and I guess it picked up on Pinterest and more and more (and more and more and more) people started coming to this measly two-month old blog!
That first viral post grew traffic from 300 visitors a day to a whopping 1,200 visitors in a day. After that initial surprise, traffic decreased, but it didn’t decrease by much.
For a few days after, the site was consistently getting 1,000 visitors a day. Then it trickled down to around 800 visitors a day.
And then, this post came out. And that just took off like wildfire on Pinterest! I couldn’t believe it.
In one day Pinterest brought 2,500 visitors!
Lessons Learned
- The biggest lesson I learned is that anyone can have a viral post. You don’t need to have blogged for ever and you don’t need an email list or be on social media all the time.
- The next lesson I learned is that you don’t have to be consistent or have a lot of content to have a viral post. You just need the right post.
- You can have more than one viral post. I wanted to see if I could generate another viral post, and I effectively did. This means this is a learned skill that anyone can do.
Can Any Blog Niche Have a Viral Post?
You bet! No matter the niche, it’s the type of post that will relate to your readers and get them hooked onto your blog.
If you are brand new to blogging, though, it’s best to find some kind of blog topic, or niche, so that you know what you are going to write about.
There are so many niches to choose from:
- Christian
- Home decor
- Beauty
- Food
- Parenting
- Newborn
- Freelancing services like photography
- Work from home
- Working mom
- Stay at home mom
- Special needs
- Post Partum
- Fitness
- Wellness
- Blogging
- Lifestyle
- Financial (making money, saving money, budgeting, frugal life)
- DIY
Smart Mom Ideas probably leans to more of a lifestyle site that talks about multiple topics like parenting, organizing, making/saving money and blogging.
Know Your Niche (And Why) Before Starting a Blog
Determining your blog’s focus is important. The list in this post is a good start. But, how do you really figure out what you want to write about for years to come?
- Think about what you can’t stop talking about – is there some topic that all your friends know you can’t stop talking about? Maybe it’s essential oils or bullet journaling or baby led weaning. This can help you narrow your blog niche.
- See if there are blogs in that niche – this is important because it tells you if your niche is viable. You can easily search on Pinterest your blog topic to see if there are pins. You can also search on BuzzSumo to figure out if your blog topic is popular (this will help you decide if you can monetize your niche too). Here is the result for farmhouse decor.
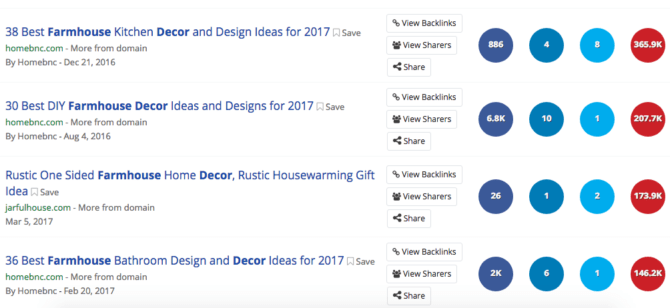
This niche topic looks extremely popular on Pinterest. This tells me that if you wanted to start a home decor blog, start writing about farmhouse decor.
- See if people are struggling with that topic – you need an audience for your new blog so that you can generate traffic and income. The best way to do that is to find a blog niche that people need help with. Even if you have a lifestyle blog like me, you can have certain topics that will address pain points for your audience.
After figuring out your niche, know the “why” behind starting a blog.
For me, the biggest “why” to starting a blog was to have some kind of creative outlet as a SAHM. I was working as a freelance writer, and I wanted somewhere to relax, vent and also to meet other moms online.
I didn’t want to drown in the day after day tasks. My other “why” was to see if I can generate a few dollars out of this whole blogging thing. I mean if other moms are doing it, why can’t I?
Figure Out Your Blog Name
Once you have a blog niche or decide to do a lifestyle blog, you need a name for your blog. The name you pick should represent your blog’s focus, but that doesn’t mean you can’t use your name or something else.
Make sure the name is easy to pronounce and spell, and that it’s short. I suggest having a couple of spare blog names just in case.
If you are struggling to figure out your blog name, why not use a generator? Name Mesh is a domain name generator and makes figuring out your blog name fun!
There are several categories they use to come up with different blog names: common, fun, short, SEO, new, similar and mix.
Here is the result for mommy fitness time.
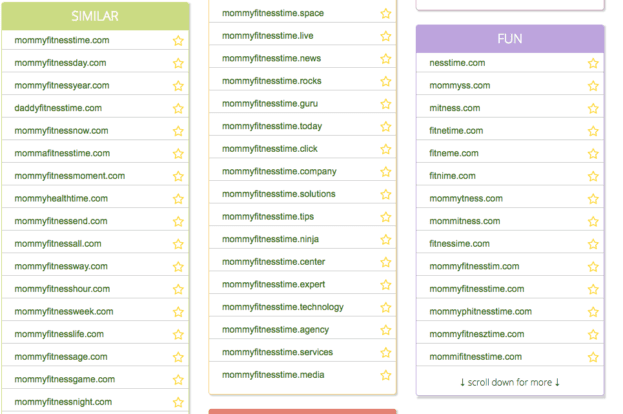
My favorites from this list are:
- mommyfitnessway.com
- mommyfitnessday.com
- mommyhealthtime.com
All of these end in a .com and for me, that’s the best domain for your blog!
Are you excited about starting a blog?
If you haven’t started a blog, but want to, here are the steps to get going with your blog.
How to Start a Blog in 3 Quick and Easy Steps
1. Choose a Web Hosting Provider
As a new blogger, the best type of blog you want is a self-hosted WordPress blog. This means it’s your blog and the content is yours and you can monetize it; you can change it around. You can basically do anything you want on your blog…including temporarily mess it up…shhhhh don’t tell anyone. 🙂
You also need a platform to have your blog on. The most popular is WordPress (.org).
So, to have a self-hosted WordPress blog you need a reputable and supportive web host. Since getting into this whole blogging world, if there’s one pet peeve I have, it’s sloooowwww blogs. This girl doesn’t have time to spare.
I lucked onto using SiteGround as my hosting provider and IMO they are the best when it comes to speedy sites.
Why Choose SiteGround for Your New Blog?
There are a couple of reasons why you should choose SiteGround. The first is that they have amazing 24- hour support. Whenever you have a question about your site, you can use their live chat anytime. If you don’t want to chat, you can phone them too. They are always available and you don’t have to wait hours to get help.
And they don’t get mad when people ask silly questions…like I’ve done many times before. Sorry guys, mom brain!
Their uptime is 99.99% incredible! It’s a fact that your blog can go down any time of the day. But, if you choose SiteGround as your hosting provider, you won’t have to worry about that. That means every time someone goes to your blog, ninety-nine (point nine nine) percent of the time it won’t be down. I’m not really up on all the lingo (or math), but I’m told that this is incredible.
These two things alone can help you get your blog up and running so that you can start getting more pageviews, and you can be confident all those future viral posts are in good hands.
But, if you want to supercharge your blog, SiteGround has the SuperCacher on the GrowBig plan. Having this can handle those viral posts with ease and won’t slow down your site. So when thousands of people show up to your blog in under one hour (don’t we wish), your site won’t even skip a beat…all because of SiteGround’s SuperCacher.
2. Choose Your Hosting Plan and Domain Name
There are three plans you can choose from as a new blogger: the StartUp, the GrowBig and the GoGeek.
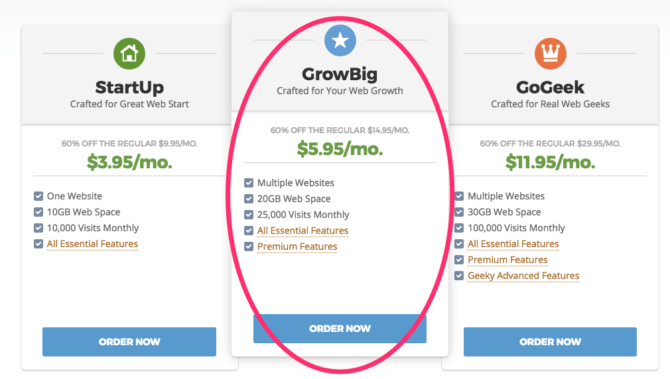
For those viral posts you want and for the best performance, choose the GrowBig plan. It comes with SuperCacher and you can add multiple sites and you don’t have to pay any extra. For only $5.95/month it’s a budget-friendly option when you’re bootstrapping your new blog. This is the plan I decided to have once I had my first viral post.
And if you aren’t sure about starting a blog, you can always start with the StartUp plan. It’s $3.95/month and will get your blog up and started on the cheap.
***Note, if you use my special link to get your SiteGround hosting plan, you’ll save 60% off the regular price!***
After you choose your plan, you’ll go to step two which is choosing your domain name. Plug in those names you figured out and see which ones are available.
3. Fill Out Your Account Information
From here you fill out your account info like:
- Password
- Country
- First name
- Last name
- Company
- State
- City
- Street Address
- Zip code
- Phone number
After this, you fill out your payment and purchase information. Be sure to pick at least the 12-month payment plan or longer to secure the 60% off discount. This means you pay for a full year (or more) up front (but it gives you the biggest savings and you don’t need to worry about another annoying monthly bill).
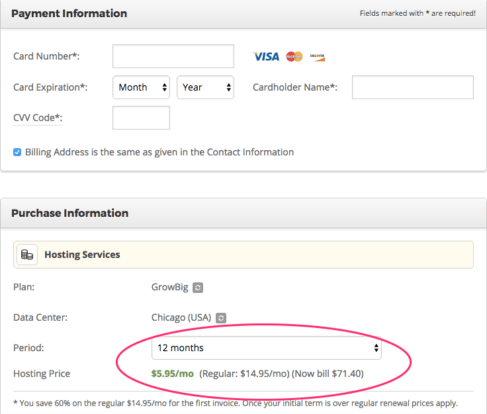
Click on the box that you agree to the terms and you’re on your way to your brand new blog! Yay!
Now you need to install WordPress so you can start blogging. SiteGround makes it super duper easy because they will do it for you.
Use their Live Chat and ask them to install WordPress. It’s as easy as that. You send them your login information and domain name and in about 15 minutes you’ll have your WordPress up and running.

Using WordPress
Go to your blog by going to: http://yoursuperdupernewdomainname.com/wp-admin
You’ll see:
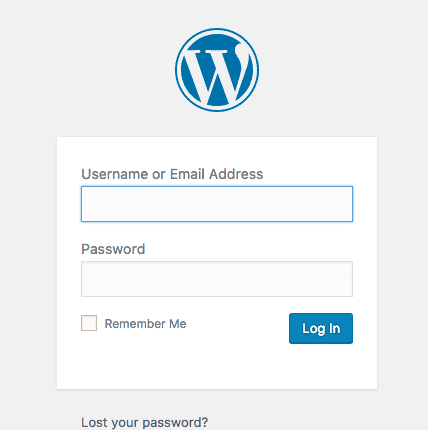
Once you login you’ll be taken to your WordPress dashboard and editor. This is where you can write your blog posts, install plugins, and add images.
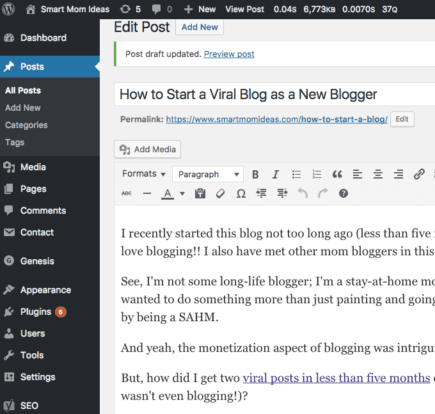
Here is what everything is on your dashboard:
Posts
This is where all your content is. You can look at all of your posts, add a new one (this is the image I am showing you. On the right is this post I am writing) and add your categories.
For me, my categories are my menu items. So, think about the topics you want to talk about. If you are doing a fitness blog you can have these category names:
- Fitness exercises
- Healthy meals
- Yoga
- Muscle building
Here are my categories:
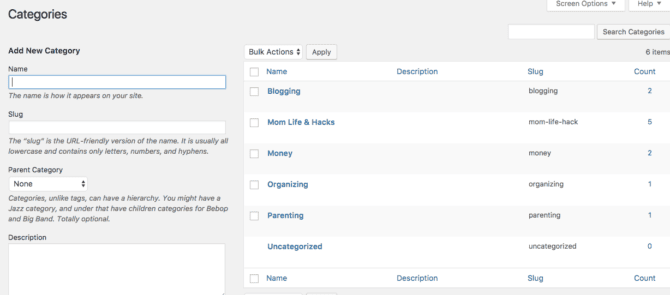
I suggest you set up your categories first so that you can create your menu later.
Tags are certain words that talk about your post. You add the tags but I personally don’t use them and feel they aren’t used much nowadays.
WordPress Editor
After you set your categories you can write your first post. Before we go into writing a viral post, let’s look at the WordPress editor.
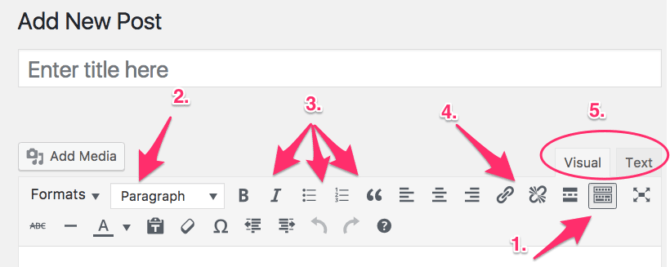
1. Toolbar Toggle
Click on this to open up your tools like you see in the image above.
2. Paragraph Formatting
When you write your blog post, it’s best to break up your post with sub-headings (like I’ve done in this post).
If you click on Paragraph, a drop-down menu appears. Every theme is slightly different, but here are some general guidelines:
Use Heading 2 for your big sub-topics (in this post they were):
- My Viral Post Story
- Know Your Niche and Why Before Starting a Blog
- Figure Out Your Blog Name
- How to Start a Blog in 3 Quick and Easy Steps
- Using WordPress
Use Heading 3 when you have a sub-topic under your Heading 2. I don’t go more than Heading 3. I just use the Bold function. This is just a general guide, your theme might be different, but be sure to use Heading tags to help out your SEO!
3. Features and Lists
You can use bolding and/or italics to emphasize certain words or phrases. You can use lists to break up your post or itemize tips.
4. Links
When you write more posts, you can start linking them to each other. This is interlinking and it’s good for SEO and to make readers stay on your blog longer (i.e. they click on your link and it takes them to another post of yours).
This is where you can click to add a link to a word or phrase.
5. Visual or Text
You can view your writing in text format, which is HTML code, if you want. Or, you can just leave it in the visual mode
Media
This is where you house all of your images or if you have PDF guides or checklists for your email subscribers. When you are writing a blog post and want to add an image, you just click on add media at the top or you drag and drop the image where you want it.
Pages
Pages are static. They are used for things like your About page or your Resources page. These pages don’t have categories and won’t show up on your blog.
You can show your pages in your Menu or on your side bar. I like putting some of my page topics in my menu along with my categories.
Comments
When you start getting comments this is where you’ll see them.
Contact
This is where you can have a contact page for readers to contact you. You will need a Contact Form plugin to install and customize. Here is a really good post walking you through those steps.
Appearance
1. Themes
Here is where you can have some fun and find a nice free WordPress Theme.
My favorites are:
2. Customize
After you install your free WordPress theme, you can customize your blog. You can add a logo, add a favicon (that’s the small image next to your blog name in the browser bar) and other things.
3. Widgets
This is how you can build your sidebar or footer. You can add widgets like your categories or tag cloud. I just add the text widget to make my little About summary or my disclosure for affiliate marketing.
4. Menus
This is where you can build your menu.
5. Header
If your blog has a header image you can add it here.
6. Editor
If you know some codes you can use the editor.
Plugins
This is where you can add new plugins for your blog. Some plugins I recommend:
Settings
For more features, you can go into Settings to change or update information.
Installing and Customizing Your Theme

Now comes the fun part – finding a theme and customizing it.
I could spend all evening picking a new theme…only to spend the next night picking a whole new theme and doing it all over again…and again. No, I’ve never done that. 🙂
My current theme is pretty basic and minimalist for now, but I’m always on the lookout for something fresh and new.
So, let’s say you decided on the free Activello. I’ll give a general walkthrough of what I’d do to get things set up. All themes are slightly different, but once you get the hang of it, it’s no biggie!
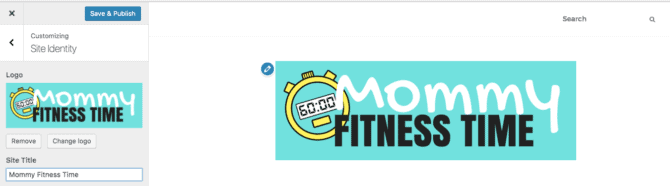
After you install and activate the Activello theme, go to Appearance > Customize.
You can go to Site Identity to put your favicon and logo on your blog. Canva is a great place to make your graphics and it’s free.
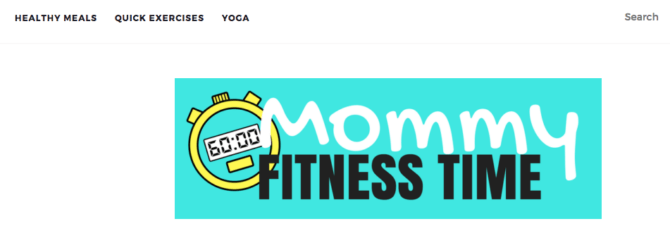
Next, set your menu by going to Appearance > Menus.
Make a name for your Menu (I chose Main) and create it. Then under Pages, click on Categories > View all and select your category topics and add them.
Click on Save and go to the top of your dashboard to visit the site and see your menu.
Adding an About Summary on the Sidebar + Image
I like to have an About Me summary on my side bar so new readers know who the blogger is right away. Go to Appearance > Widgets.
Scroll down until you see “text” and drag that into the white sidebar box. Here you can add your headshot and a little summary of you. If you already made your About page you can link to that page in your summary for “more info.” Here’s my made-up About summary for “Maddy.”
I’m no HTML girl, but I like to think I’m able to follow directions and I’ve only broken things a handful of times. 🙂
I wanted the picture to be rounded like you see on a lot of blogs these days. So, here’s how I did it. If you’re not comfortable with HTML and code, just skip over this part. Square is nice too and I was this close to having mine square.
When adding your image, go to a Custom HTML widget and add this to your IMG tag,:
<img …….(lots of existing stuff here)…………. style=”border-radius: 50%;” ……(lots of existing stuff here)…………./>
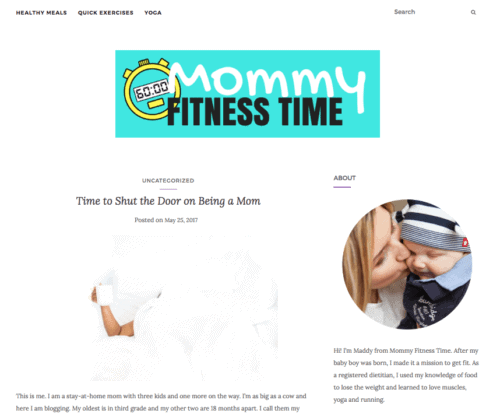
This is what it will look like (if you had a post already):
Adding an About Page
Go to Pages > Add New and write a paragraph or two about you and your blog. Add images if you want and if you have some posts, link to those too!
Now, it’s time to write your viral post.
Writing Your Viral Post
What I’ve found from the admittedly short time I’ve been blogging in this niche is that popular viral posts that do well on Pinterest and Facebook are list types of posts and unusual how-to’s. Since it’s hard to come up with an unusual how-to on the spot, I’ll dive into using a list type of post.
Step 1: Find Your Idea

Go to BuzzSumo and Pinterest to find if your idea is popular. For example, we found out that farmhouse decor is extremely popular on Pinterest.
You can create a list type of post in that niche if you have a lifestyle or home decor blog. Some topic ideas are:
- 50 Farmhouse Ideas for the Minimalist Home
- 80 Best Paint Color Themes for your Farmhouse Decor
- 45 Farmhouse Printables for Your Living Room
- 67 Farmhouse Ideas for Your Bathroom
With a viral list post, make the list long and niched down as much as possible.
Step 2: Don’t Skimp on the Post
Viral types of posts are usually in-depth and valuable. This means you can’t just list all your 80 ideas with no explanation.
Take the time to write a couple of sentences for each of your tips. And, include a lot of beautiful pictures – free stock photos like these, pins from other bloggers or your own photos.
Writing a viral post takes (me) a LONG LONG LONG time. Like…a really long time. It’s a project for me, and one that I love doing. But I don’t whip these out in a few hours.
On the bright side, I usually learn a bunch of new ideas and pick a few tips that I can use with the kiddos!
Step 3: Create Multiple Pins
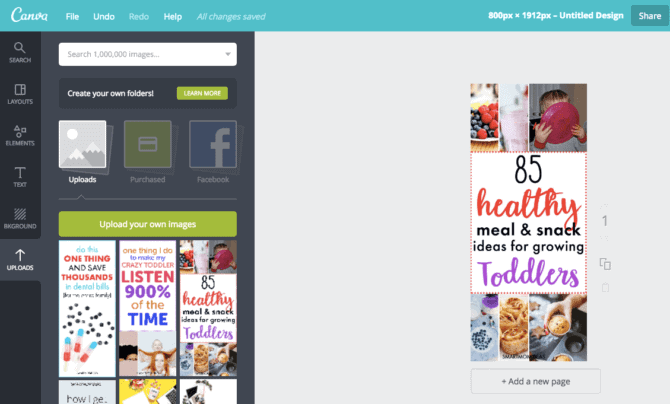
To get more traction for your blog, create multiple Pin graphics and share them on your boards and on group boards. For me, there’s nothing funner than spending hours in Canva or Photoshop. I get to be all creative and all.
Step 4: Promote Your Post on Twitter and Facebook
For even more traction, promote your post on Twitter and on your Facebook page.
Step 5: Have a Promotion Schedule
Many mom bloggers are using a program called BoardBooster to get their Pinterest-fu on. I am not using any scheduling tools right as of today (**update** I’m now using Tailwind and loooving it**), so I’m manually sharing my posts on social media. I have a schedule to promote my high re-pin’s posts. It’s a hobby for me, I get to see what other bloggers are doing, and it sure beats cleaning the kitchen for the umpth time of the day.
If you use BoardBooster or a similar program called Tailwind, you can schedule your big list posts more often.
You’re Ready to Create a Viral Blog
There you go! How to start a blog using SiteGround and WordPress and how to use WordPress to create your first viral post!
***Don’t forget to download your Start a Blog Checklist (no email sign up required) that goes through the steps to starting your blog! Just click on the image below!***
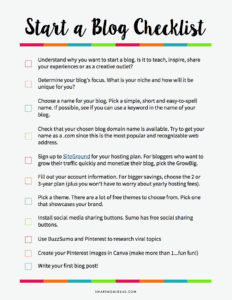
Thanks so much for picking up the free checklist. Please leave a comment and tell me your new blog! I want to see it and your first big viral post!! ? ? ?
")


Leave a Reply